This article describes how to use the Vivado and petalinux to develop the SPI peripheral interface of the Zynq7000 series of chips.
Development environment:
Vivado 2015.4
Petalinux 2015.4
First, the construction of hardware engineering
1. Open the vivado development environment, create a new project, and select the chip model you are using (this article uses xc7z045ffg900-2 this chip);
2. Click "CreateBlock Design" to create a new project wallpaper, add IP to it, add the ZYNQ7 chip IP;
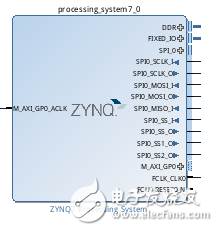
Figure 1 ZYNQ7 IP
3. Double-click the IP of the ZYNQ7 chip, and click on the Peripheral I/O Pins on the left side of the interface to configure the pins of the chip. Click “Quad SPI Flashâ€, “Ethernetâ€, and the “EMIO†and “UART1†on the far right of SPI0. Set the pin to enable;
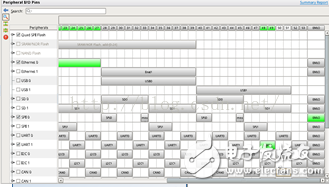
Figure 2 Peripheral Pin Configuration
4. Open the “DDRConfiguraTIon†page, click “DDR Controller ConfiguraTIonâ€, and then click the drop-down menu to select the DDR type you are using. This article selects MT41J256M8 HX-15E DDR chip as shown in the figure;
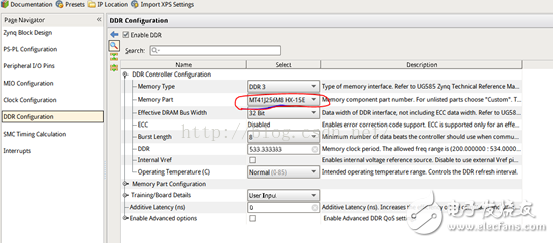
Figure 3 DDR configuration
5. After the DDR configuration is complete, exit the ZYNQ configuration interface, click on the SPI pin in the ZYNQ7 IP, select the appropriate IO port, right click and select Make External to bring the pin out.
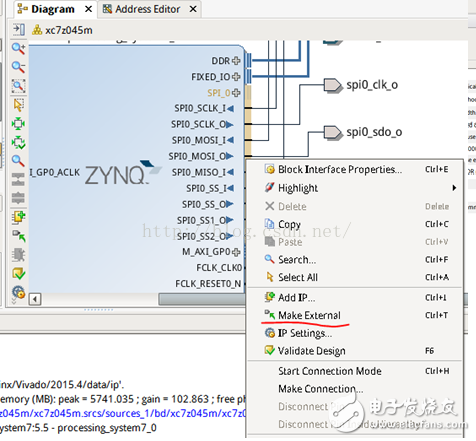
Figure 4 leads out the pin
6. After all SPI related pins are pulled out, as shown in the figure below, click auto connetcion to bring out the DDR and FIXED pins.
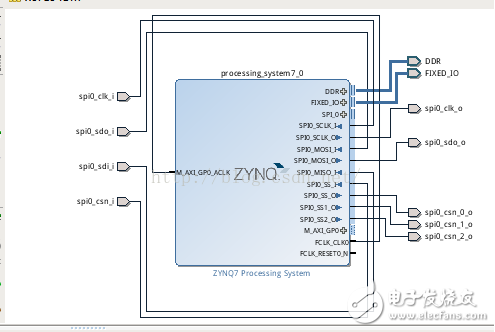
Figure 5 Configuring DDR and FIXED Pins
7. After the pin configuration is completed, instantiate the IP of ZYNQ7 in the top-level file, and double-click the top-level file in the “source†interface bar to open the hardware code editor.
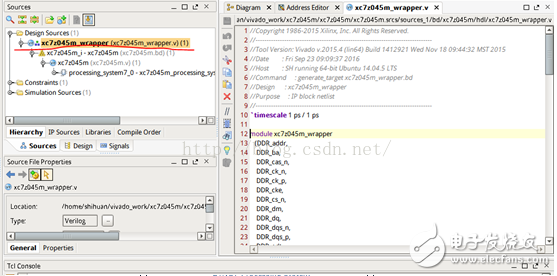
Figure 6 top level code
8. Add the spi-related port and instantiation code to the top-level .v code on the right. The added code is as follows (since this example only uses four interfaces of spi, so when instantiating the spi interface, only use Four of them are reached, other floating or direct input high and low level);
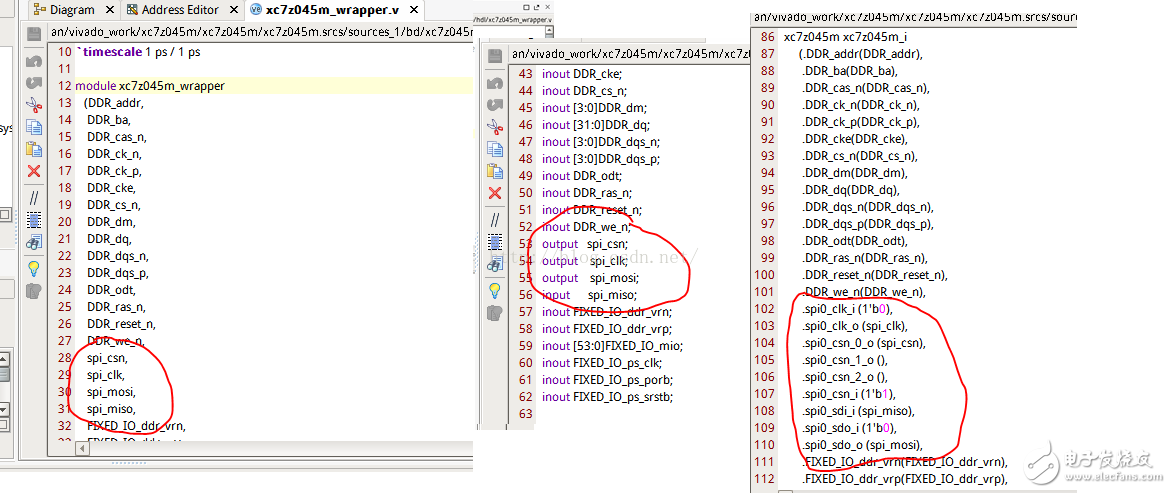
Figure 7 Add interface and instantiation code
9. After the code is added, synthesize the structure and layout (implementaTIon). After the integration and layout are completed, constrain the pins. Click “open implementaTIon†to open the layout result. Click “Windows†at the top to select it. "I/O Ports", which constrains the external interface of the SPI (select the corresponding hardware pins according to the connection of the interface in the schematic diagram);
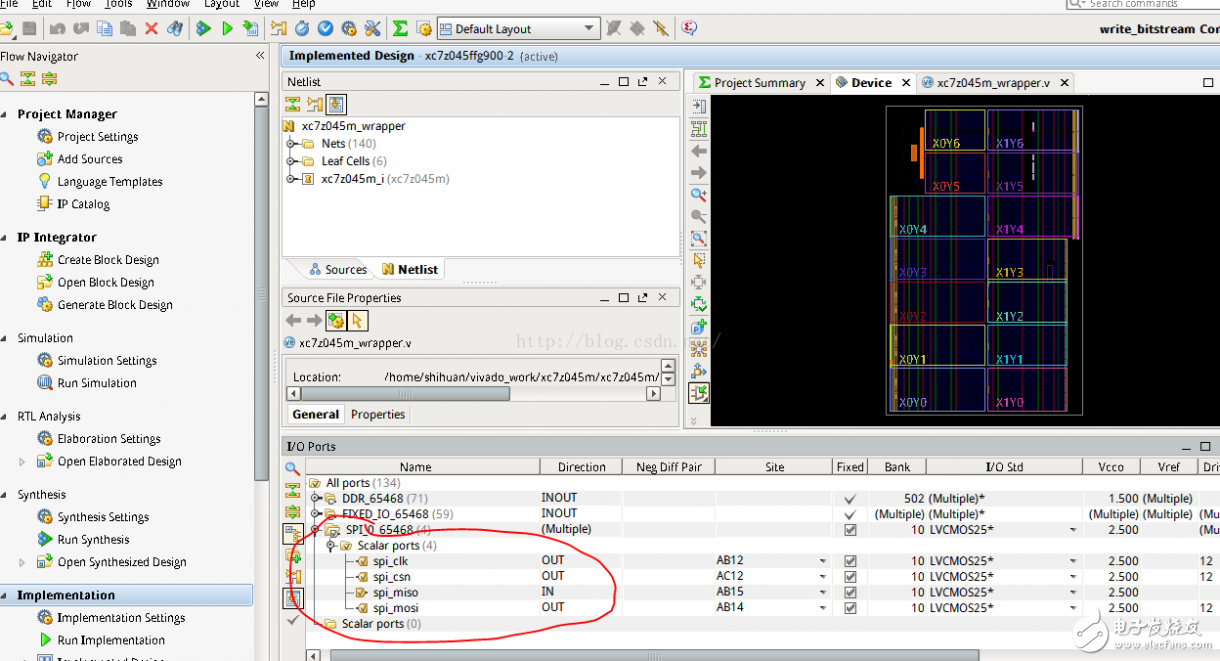
Figure 8 pin constraints
10. After the pin constraint is completed, re-implement the project;
11. Finally click "GenerateBitstream" to generate the bit file;
12. Click "File" - "Export" - "Export Hardware" to export the hardware project;
Second, the construction of hardware engineering
1. In Linux, create a Zynq project using petalinux;
2. Use the petalinux-config–get-hw-description command to import the hardware project .hdf file generated by vivado into the software project.
3. Use the petalinux-config–c kernel to crop the kernel and select the SPI driver in the driver.
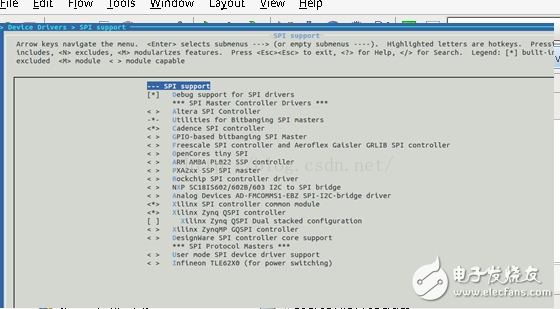
Figure 9 Check the SPI driver
4. Use the petalinux-build tool to compile the entire project, then use petalinux-package to generate the BOOT.bin file.
5. Start the Linux system with the hardware platform or QEMU, you can see the spi driver in the system.
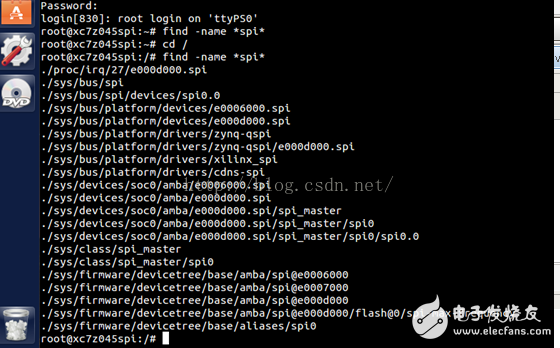
Figure 10 SPI driver under Linux
Annealing Machine,Pv Copper Strip Annealing Machine,Pv Copper Strip Annealing Equipment,Annealing Heat Treatment Machine
Jiangsu Lanhui Intelligent Equipment Technology Co., Ltd , https://www.lanhuisolar.com
